Crochetkari

Thursday 30 November 2017

Harmony Cowl Free Crochet Pattern

Namaste friends! 

I am sure many of you are frantically crocheting/knitting/sewing/crafting to get your gifts done in time. So it seemed like the perfect time to share my pattern for the Harmony Cowl.
Harmony cowl free pattern
When two of my favourite crochet stitches blended harmoniously to make this cowl, Harmony seemed like an apt name for it.

Harmony cowl free crochet pattern

I like the Camel stitch as it creates a really elegant stitch with a faux knit look and is wonderful for edges. The moss stitch is dainty and produces a soft, lovely fabric.

Harmony cowl pattern border

The Harmony cowl pattern ticks so many boxes - it is unisex, chainless, seamless, a stash buster and works up in a jiffy. Use as many colours as you like in the body of the cowl. The light brown cowl has four colours and the cream cowl uses three colours in the body. 

Harmony cowl Cream

Now onto the pattern:

Materials:
For light brown cowl:
100 gms of worsted weight yarn in Main colour - A) light brown
20 gms (approx) of worsted weight yarn in each of the three different colours 
- B) cream, C) salmon and D) peach.

Hook: 5 mm

Finished size of cowl: 36" by 9"
Gauge: 16 sts and 16 rows = 4" in moss stitch
~~~~~~~~~~~~~~~~~
For cream cowl:
70 gms (approx) of DK wt yarn in Main colour - A) cream
20 gms (approx) of DK wt yarn in each of the two different colours
- B) red and C) blue.

Hook: 4.5 mm

Finished size of cowl: 32" by 8"
Gauge: 17 sts and 19 rows = 4" in moss stitch
~~~~~~~~~~~~~~~~

Stitch abbreviations (In US terms)
Fsc: foundation single crochet
beg: beginning 
ch: chain
sl st; slip stitch
sc: single crochet
hdc: half double crochet
sk: skip
rep: repeat
yo: yarn over
sp: space
Rnd: round

Special stitches:
Fsc: Foundation single crochet
Start with a slipknot, chain 2. Insert hook in second chain from hook, pull up a loop. Yo, draw through 1 loop - “chain” made, Yo, draw through 2 loops on hook - "single crochet" made. (1st Fsc made).  *Insert hook under the 2 loops of the “ch” st of the last st and pull up a loop, yo and draw through 1 loop, yo and draw through 2 loops. Repeat from * to make the required number of Fsc.
Camel stitch: this stitch is made by working a hdc into the horizontal loop, behind the front and back loops of the stitch. This loop is also called the third loop and can be seen on the wrong side of the fabric.
Moss stitch: On camel stitch round - 
1st round - Ch 2, *sk 1 hdc, sc in next hdc, ch 1, rep from * around. Join with sl st in 1st ch.
2nd round - with new colour, join with sc in any ch-1 sp, ch 1,  *sk 1 sc, sc in next ch-1 sp, ch 1, rep from around. Join with sl st in 1st sc. 
Rep 2nd round, using a new colour for every round.

The cowl is worked in the round, without turning, which means the right side of the cowl will always be facing you.

Rnd 1: Using main colour A) - keep a long tail and make Fsc 140 (refer Special stitches),      Join with sl st to first sc. 
Use the long tail to join the first "ch" to the last "ch" of the round thus closing the first round.

Rnd 2: Ch 1, pull up the loop to the height of a hdc, make a hdc in the horizontal loop behind the first sc below, work in camel st (or hdc in horizontal loop) around (refer Special stitches), join with sl st into the first chain.

Rnd 3 and 4: Rep Rnd 2.

Rnd 5: Ch 2, sk 1, sc in next st, *ch 1, sk 1, sc in next st, rep from * around ending with ch 1, join with sl st in first ch of beg ch 2.

Rnd 6: Using colour B) - Join with sc in any ch 1 sp, ch 1, *sk 1 sc, sc in next ch-1 sp, rep from * around ending with sl st in first sc.

Rnd 7: Using colour C) - Rep Rnd 6

Rnd 8: Using colour D) - Rep Rnd 6

Rnds 9 to 12: Rep Rnds 5 to 8 maintaining the colour sequence. #

Rnds 13 to 16: Rep Rnds 5 to 8.

Rnds 17 to 20: Rep Rnds 5 to 8.

Rnds 21 to 24: Rep Rnds 5 to 8.

Rnds 25 to 28: Rep Rnds 5 to 8. 
Colours B, C and D will no longer be used so fasten off each colour at the end of the respective round.

Rnd 29: Using colour A) rep Rnd 6.

Rnd 30: Ch 1, pull up the loop to the height of a hdc, *hdc in the horizontal loop behind the first sc below, hdc in back bump of ch, rep from * around, join with sl st into first chain.

Rnds 31 and 32: Rep Rnd 2.

Rnd 33: Rep Rnd 2, but work the camel st using SC INSTEAD OF HDC
This ensures that the upper edge of the cowl resembles the lower edge of the cowl.
Fasten off. Weave in the ends.

If the thought of weaving in all those yarn ends after each round seems daunting, here's a pic of the wrong side of my cowl.

Harmony cowl wrong side detail

I just carry my yarn up to the next working row. # This means that you end with Only Two ends of each colour to weave in! Great, right? 
If you would like me to show you this method of carrying the yarn up the wrong side in another post just let me know in the comments.

Harmony cowl Beige

I love this cowl and I hope you enjoy crocheting this pattern. I have made this cowl twice but if you find an error, be a dear and please let me know.

Friday 31 March 2017

Mandala mania 4 - Pretty Pastels + Giveaway winner

Namaste friends. It is crochet month so a mandala post is a must, right?

But before that let me announce the winner of the pattern giveaway for the Cupid's Dilemma cowl
And the winner is:
Susan Guard

Happy crocheting Susan. Your pattern is on the way to your Inbox. :)

This pattern is available in my Etsy and Craftsy shops.

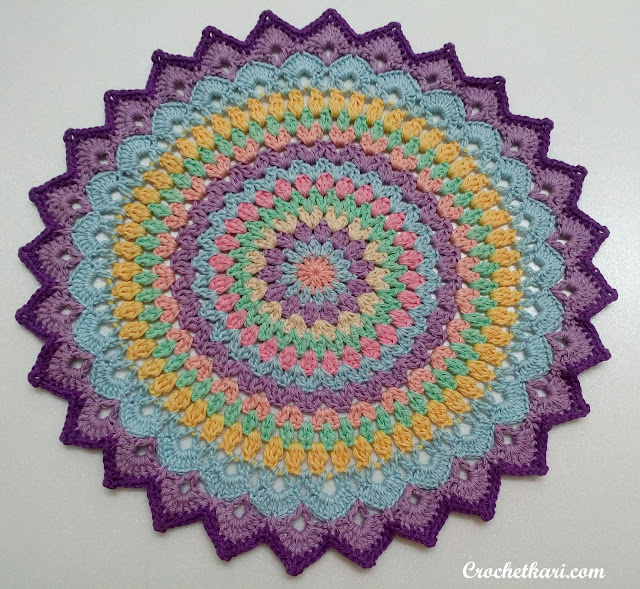
And now on to my Spring inspired Pretty Pastel Mandala.

crochet lotus mandala

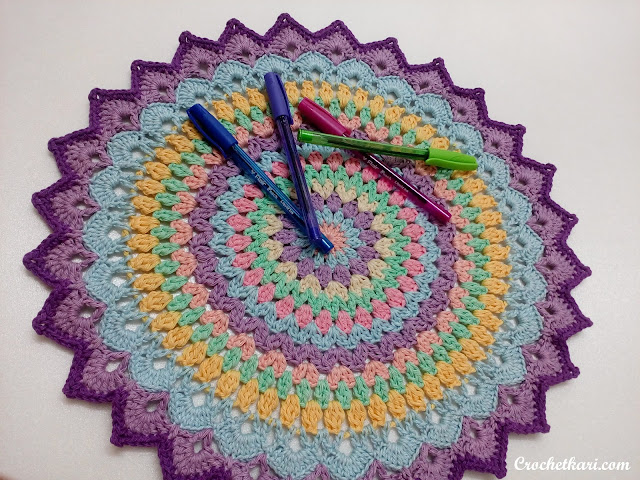
This is the fourth mandala I made using the same pattern. This mandala is a wee bit larger than the previous three mandalas as I modified Round no. 11 (in yellow), and made 3dc clusters instead of puff stitches.

crochet lotus mandala

Here are the details of the mandala;
Pattern source:   Crochet Millan.com
Yarn:                   Laura Knitting cotton
Hook:                  3.50 mm
Size:                   16 inches diameter

crochet lotus mandala

Here is a look at all four mandalas:

crochet lotus mandala collage

Check out mandala 1, mandala 2 and mandala 3.

Crocheting mandalas is very satisfying and almost meditative. Do give it a try.

Keep Calm and Crochet On.

Wednesday 22 March 2017

Crochet Geometry - Book Review

(This post contains affiliate links*)
Namaste friends. Have you ever thought of taking your crochet skills a step further? Something more than doilies, afghans and bags? 

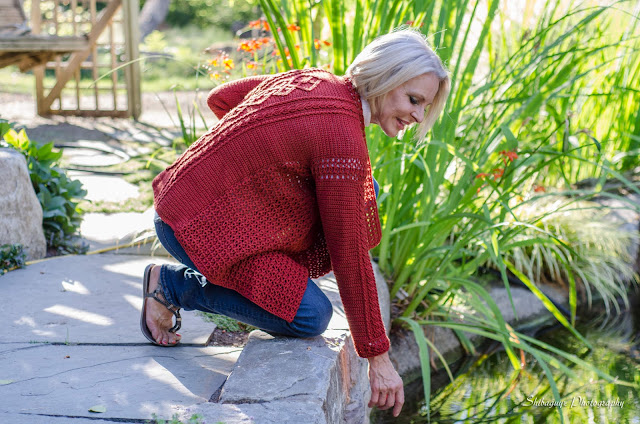
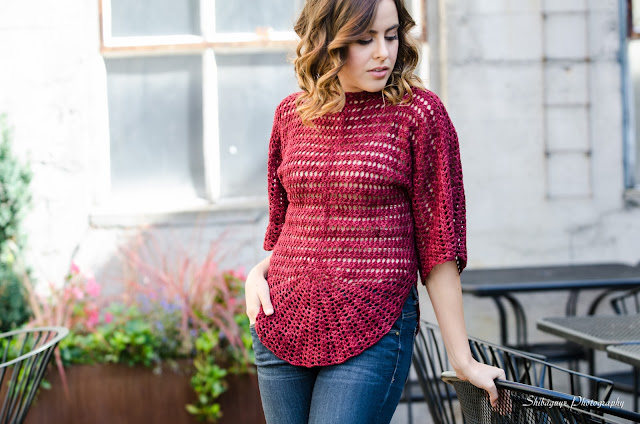
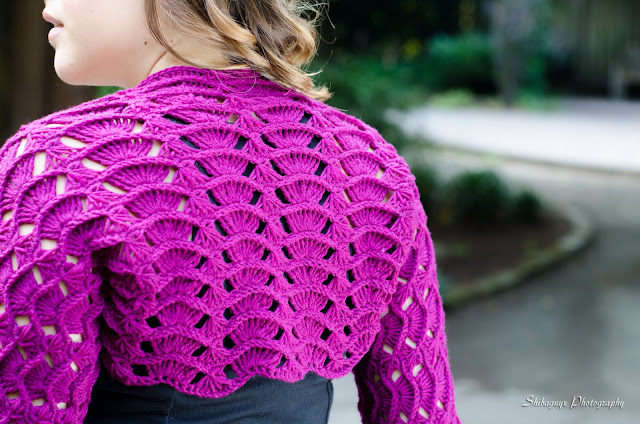
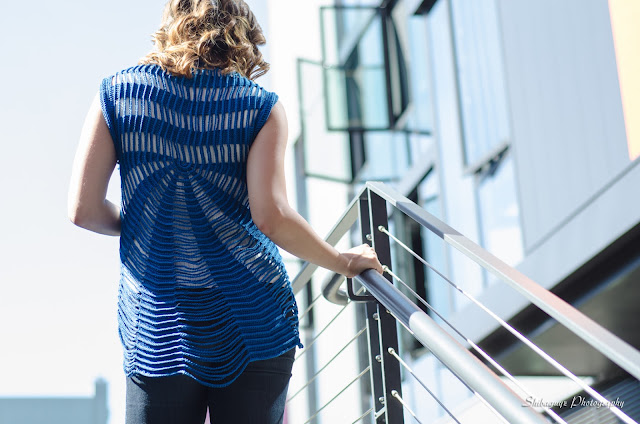
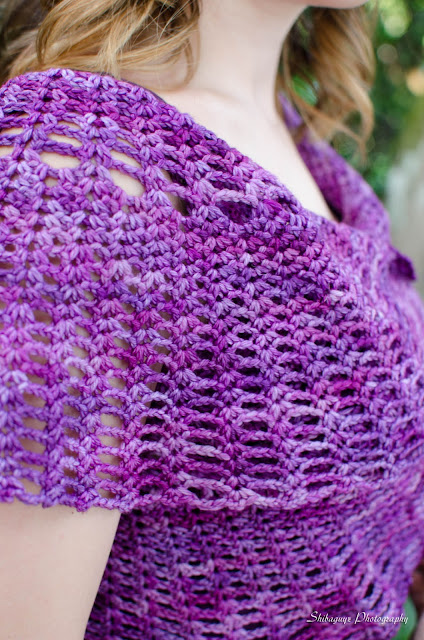
For a long time now I have been wanting to crochet a garment that would actually fit me and not look awkward. So when the magic words "Sizes Small to 5X" jumped at me from the front cover of Crochet Geometry* my interest was piqued! A quick preview online and I was certain that I have to grab this book.

crochet geometry cover

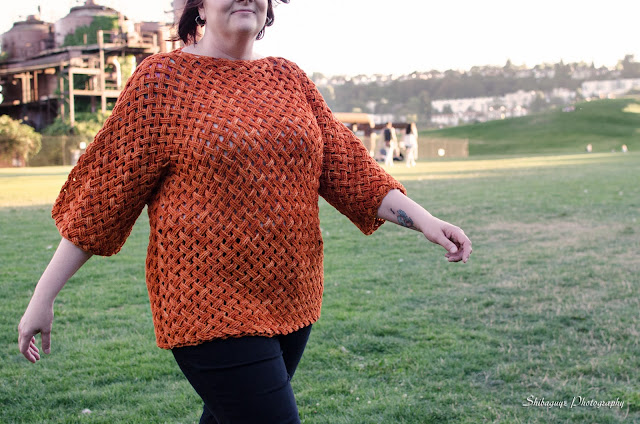
Firstly, the garments are modelled by regular women! Yes, women in all shapes and sizes. Now there are tons of patterns online both free and paid, but the fact that they were always displayed on models who had just walked out of Victoria's Secret runway was a big deterrent. How the garment would look on a regular person was a mystery especially since I am a size mumble mumble...haha. 

crochet geometry 5 easy pieces

crochet geometry T top

Next, the garments are in gorgeous colours, No greys and beiges. Also there is lacework as well as solid patterns. I was "hooked"! (oh, when are crocheters going to stop using this cliche...lol) 

crochet geometry circle t top

crochet geometry shawl collar cardi


Why Geometry? The author Shannon Mullett-Bowlsby takes basic geometric shapes - circles, squares and rectangles and manipulates them to produce gorgeous garments with a lovely drape and elegant fit. Does that mean these patterns are for experienced crocheters? Of course not, this is where your expertise with mandalas, scarves and granny squares will be taken to the next level. 

There are projects for all skill levels - Easy, Intermediate and Experienced.

crochet geometry sleeve shrug

The book has 15 patterns in four categories: Shrugs, Cardigans, Pullovers and Wraps. 
The yarns used are Super-fine to Medium, making the patterns ideal for Indian climate.

crochet geometry half circle wrap

crochet geometry split circle cardi

Each pattern explores a different texture and with charts for every special stitch pattern, one is spoilt for choice. My "favourite" project changes every time I open the book. 

The superb photography by Jason Mullett-Bowlsby which make the garments "pop out" of the pages, doesn't make it any easier to choose :) I often refer to this wonderful article about natural light photography by Jason.

crochet geometry two circles wrap
{All images belong to Shibaguyz Photography and used with permission}

Crochet Geometry is a must-have addition to any serious crocheter's library.

The book is available on Amazon.in* (that's where I bought it) and of course it is also on Amazon.com*.

Check out all the patterns and read more about the Shibaguyz duo HERE

Right now I am busy swatching (my biggest learning from the book), but there should be a Ta-dah post sooner than later, hopefully :)

Note: This is NOT a sponsored post and I have not received any compensation for writing it. I purchased the book and loved it, and all the comments/opinion shared above are mine. This post does contain affiliate links*, check full DISCLOSURE.

Printfriendly

Print Friendly and PDF

Disclosure:

Crochetkari is a participant in various Affiliate marketing programs such as ShareASale, Flipkart, Target and Amazon. Any links to these sites may yield me a small commission, upon purchase, at no extra cost to you. Disclosure